Have you ever heard of Fimo Clay? How about polymer clay? No? Well, buckle up, ’cause we’re going on a fun, crafty ride!
Fimo Clay, polymer clay – sounds fancy, right? But don’t worry, we’re going to break it all down so even the most beginner of beginners can get the hang of it.
By the time we’re done here, you’ll be a clay wizard, ready to sculpt, mold, and create whatever your heart desires!
What is Fimo Clay?
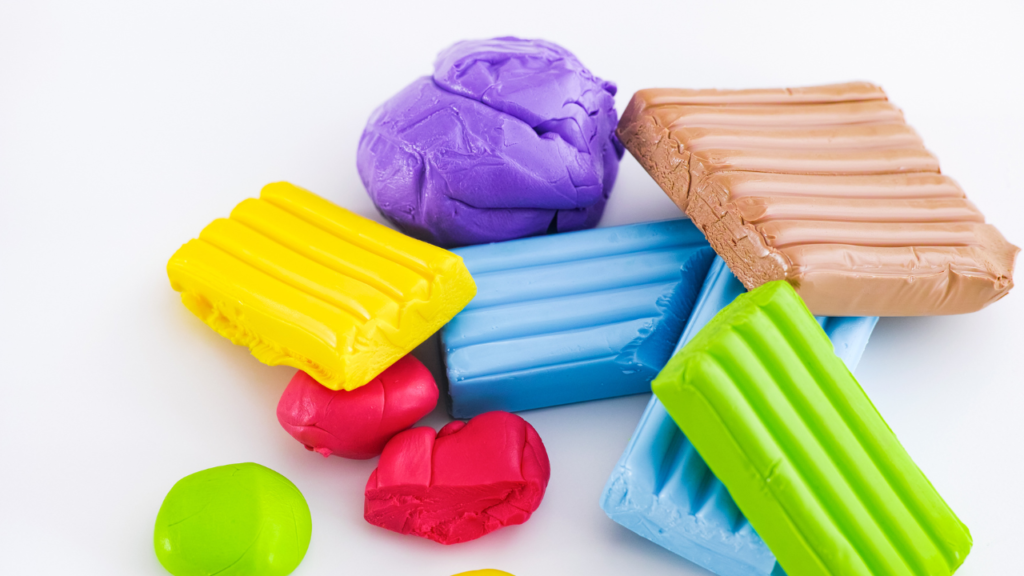
Fimo Clay is a type of polymer clay that is a versatile and easy-to-use modeling material.
It’s made from a combination of PVC (polyvinyl chloride) and plasticizers, giving it a soft and pliable texture that can be easily molded and shaped.
Fimo Clay is popular among artists, crafters, and hobbyists for creating various items such as jewelry, sculptures, miniatures, and decorative objects.
One of the unique features of Fimo Clay is that it doesn’t dry out when exposed to air.
Different Types of Fimo Clay and Their Uses

Fimo Soft
Fimo Soft is a popular choice for beginners and experienced crafters alike.
It has a smooth and soft texture, making it easy to shape and mold.
This type of Fimo Clay is great for making jewelry pieces like beads, pendants, and earrings.
You can also use it to create small sculptures or decorative items.
The best part is that Fimo Soft comes in a wide range of vibrant colors, allowing you to express your creativity and mix shades to achieve the desired look.
Fimo Professional
Fimo Professional is known for its excellent quality and durability.
It has a slightly firmer consistency compared to Fimo Soft, which makes it perfect for creating intricate details and precise designs.
This type of Fimo Clay is often used by professional artists and advanced crafters who seek a higher level of precision and control in their creations.
It is ideal for sculpting figurines, detailed miniatures, and intricate jewelry components.
Fimo Effect
If you’re looking to add some extra pizzazz to your projects, Fimo Effect is the way to go.
This type of Fimo Clay offers a variety of special effects and finishes, such as metallic, translucent, and glittery textures.
With Fimo Effect, you can create eye-catching jewelry pieces, decorative accents, and embellishments that have a touch of sparkle or an interesting texture.
It allows you to experiment and add a unique flair to your creations.
Fimo Kids
Fimo Kids is specially designed for young crafters and beginners.
It is softer and easier to manipulate than other types of Fimo Clay, making it safe and enjoyable for children to use.
Fimo Kids comes in vibrant colors that appeal to young imaginations.
It’s an excellent choice for making colorful and fun jewelry, keychains, and small toys.
Supervision is always recommended when children are using Fimo Kids to ensure a safe and enjoyable crafting experience.
How to Get Started with Fimo Clay
Fimo clay: Choose the colors that inspire you. It’s a good idea to start with a basic set that includes primary colors like red, blue, and yellow.
Clay tools: You don’t need anything fancy, to begin with. Basic tools like a rolling pin, a craft knife, and a smooth work surface will suffice.
Baking tray: Fimo clay needs to be baked to harden. Make sure you have a baking tray dedicated to your clay projects.
Oven: A regular home oven is all you need to cure the clay. Just remember to follow the manufacturer’s instructions for temperature and baking time.
How to Use Fimo Clay

Using Fimo clay is a simple and enjoyable process. Here’s a step-by-step guide on how to use Fimo clay:
Choose the type of Fimo clay
Select the appropriate Fimo clay depending on your project. You can choose from Fimo Soft, Fimo Professional, Fimo Effect, or Fimo Kids.
Condition the clay
Remove a small piece of clay from the package and begin to knead it in your hands. This will soften the clay and make it more pliable. This conditioning process may take a few minutes.
Blend colors
If you want to create custom shades, mix different colors of Fimo clay together by kneading and rolling until the desired color is achieved.
Shape and mold
Use your hands, tools, or molds to shape and form the Fimo clay into the desired design. Be careful to avoid leaving unwanted fingerprints.
Smooth the surface
If needed, gently use your fingers or tools to smooth out the surface of your clay design, removing imperfections and fingerprints.
Bake the clay
Preheat your oven according to the instructions on the Fimo clay packaging. Place your finished creation on a baking sheet lined with parchment paper or aluminum foil. Bake the Fimo clay according to the package’s temperature and time recommendations, usually around 230°F (110°C) for 30 minutes.
Cool and harden
Once the baking time is complete, remove your creation from the oven and let it cool down completely. This will ensure that the clay hardens properly and becomes solid and durable.
Add finishing touches
If desired, you can paint, varnish, or add other embellishments to your finished Fimo clay piece.
Care for your creation
Properly store your Fimo clay pieces to maintain their integrity, and clean them with a soft damp cloth if required.
How to Store the fimo clay
Alright! So you’ve got your Fimo Clay, but how do you store it? Here’s a simple guide to keep your clay in tip-top shape:
- Wrap It Up: First off, wrap your Fimo Clay in wax paper or cling wrap. Make sure it’s nice and tight to keep out air.
- Box It: Next, put the wrapped clay in a box. This can be a plastic container or even a ziplock bag. Just something to give it an extra layer of protection.
- Cool It: Store your box of Fimo Clay in a cool, dry place. Avoid direct sunlight and heat, which can mess up the clay’s consistency.
- Separate It: If you have different colors of Fimo Clay, keep ’em separate. You don’t want the colors bleeding into each other.
- Check It: Every once in a while, check on your clay. If it’s getting hard or crumbly, it might be time for a new batch.
![Top 7 Mini Pottery Wheel for 2023 [Reviewed]](https://simplyminiatures.com/wp-content/uploads/2023/07/Mini-Pottery-Wheel-for-2023-768x432.png)
![50+ Free Printable Miniature Food Labels [FREE DOWNLOAD]](https://simplyminiatures.com/wp-content/uploads/2023/08/Free-Printable-Miniature-Food-Labels-768x432.png)
![Best 5+ Miniature Lights for Dollhouses [Tested & Reviewed]](https://simplyminiatures.com/wp-content/uploads/2023/04/Best-Miniature-Light-for-Dollhouses-768x432.png)